 Search
Handy Techniques for Cutting Out Hair in Photoshop
Page 1 of 1

Handy Techniques for Cutting Out Hair in Photoshop
![]() by discovery Sat Jun 02, 2012 1:47 am
by discovery Sat Jun 02, 2012 1:47 am
Handy Techniques for Cutting Out Hair in Photoshop
 When
When
trimming out images in Photoshop, human hair or animal fur always
proves troublesome and can be tricky to achieve a realistic look. Here
are two techniques I use on images with both plain backgrounds, and
those with a varied background tones, each achieving pretty decent end
results.
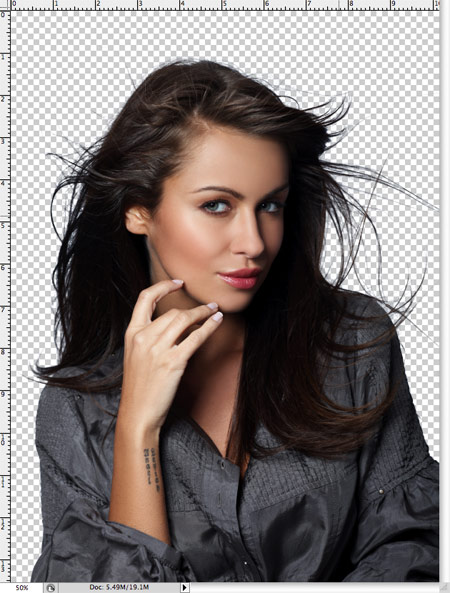
Technique One: Images with Plain Backgrounds
The
best photos are those professional studio type shots that are taken
against a plain white background. These shots make it much easier to
find the edges of the subject, but trimming out fine hairs can still be a
little tricky. In this example we’ll be using the common Channel
technique to trim out this lovely lady.
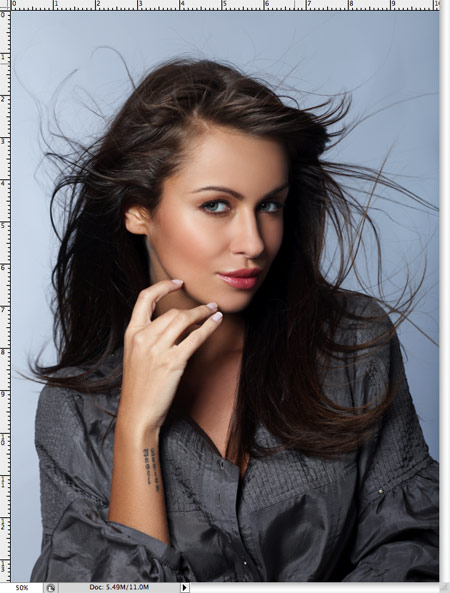
Open
up your image in Photoshop. This particular image doesn’t have a pure
white background, but it is a plain colour and has good contrast between
the subject and grey backdrop.

Head
over to the Channels palette and review each of the Red, Green and Blue
channels. Each one will be made up of slightly different tones, pick
the one with the most contrast between foreground and background. Drag
this channel onto the new channel icon to duplicate it.
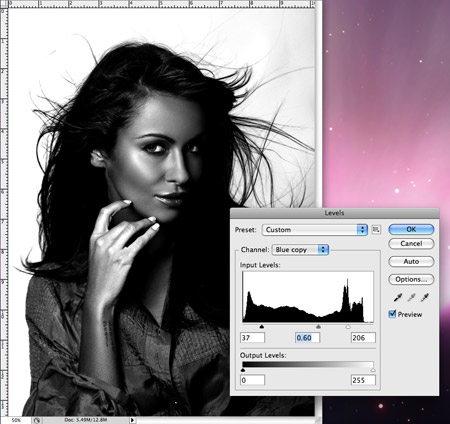
With
only the new channel selected, adjust the Levels (CMD+L) to
dramatically increase the contrast between light and dark areas.
However, don’t go too far, as you’ll notice some horrendous pixilation
appearing in the fine areas.

Due
to the slight variation in tone of the background, it appears grey in
the darker areas. Use the Dodge tool set to a low Opacity to target the
highlights and brush over this background area to really brighten it up.
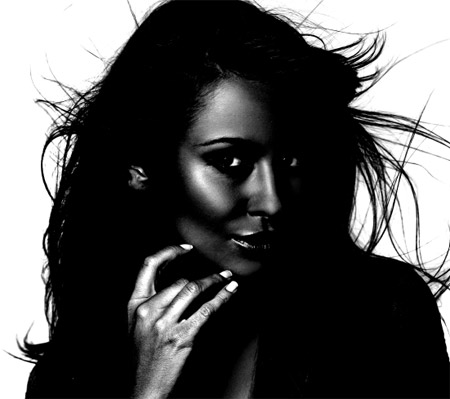
Switch over to the Burn tool and target the shadows to dramatically darken down the inner areas of the image to pure black.

Use the brush tool to finish off the blacks by painting over the remaining areas of the inner section of the image.
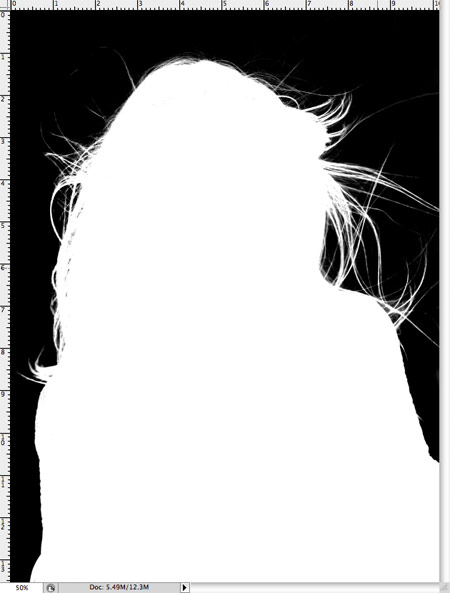
Inverse
the image to switch over the black and white areas (CMD+I), and give a
quick check for any stray areas that may have been missed by the brush.
CMD+Click
the Channel thumbnail to load the selection, then turn back on the
visibility of the original channels. Head back over to the Layers
palette and copy the selection. Paste it on a new layer and hide the
original to see the cut out image against transparency.

The
selection has managed to trim out even the finest of hairs to give a
realistic cut. Paste the photo against an alternate background. Zoom in
and check for any light coloured fringes around the edges, especially if
placed against a darker background. These can be reduced using the Burn
tool set to Highlights and gently brushed over the outline of the
image.
Technique Two: Images with Detailed Backgrounds
The
Channels technique is all well and good for studio photography with
plain backgrounds, but it gets a little more difficult on standard shots
with detailed backgrounds getting in the way.

Open
up your image in Photoshop. This image has a decent contrast between
foreground and background, but certain areas of the hair do blend in
with the darker tones of the backdrop.
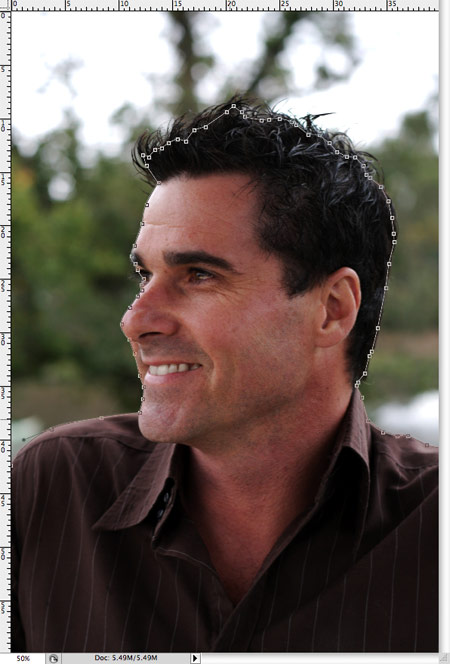
Start by trimming out the clear edges with the Pen Tool, but when you reach the hair simply create a rough tracing.
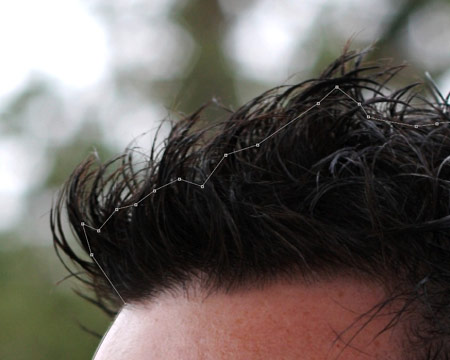
Around
the hair portion, aim to include only solid areas of hair that aren’t
merging with the background, otherwise the lighter tones will mess
things up later.

Make
a selection with a feathering of 0.2 pixels to remove any harsh edges
then paste onto a new layer. Reduce the transparency of the image so
that the original hair line can just be seen.
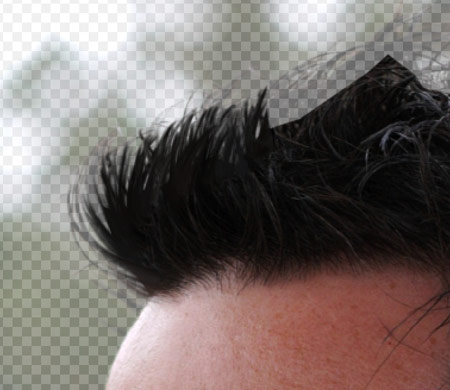
Here’s
where the fun begins! Use the Smudge Tool to draw in areas of new hair,
using the original outline as a template. Begin with a 4px brush to
flesh out the thick base hair and disguise the jaggy lines from the
path. A Wacom Graphics Tablet really comes in handy here to speed up the
process and help add varied line thicknesses.

The
new hair will soon flesh out the image back to its original appearance.
It doesn’t look too bad at this stage, but repeating the process with a
thinner brush will draw in those individual hairs.

Use a 2px brush with the Smudge Tool to draw thin stray hairs in varied directions to add realism to the image.

The photo can then be placed on any background with ease, and displays a crisp cut-out with no fringing or loss of fine detail.
http://blog.spoongraphics.co.uk/tutorials/handy-techniques-for-cutting-out-hair-in-photoshop
Whentrimming out images in Photoshop, human hair or animal fur always
proves troublesome and can be tricky to achieve a realistic look. Here
are two techniques I use on images with both plain backgrounds, and
those with a varied background tones, each achieving pretty decent end
results.
Technique One: Images with Plain Backgrounds
The
best photos are those professional studio type shots that are taken
against a plain white background. These shots make it much easier to
find the edges of the subject, but trimming out fine hairs can still be a
little tricky. In this example we’ll be using the common Channel
technique to trim out this lovely lady.
Open
up your image in Photoshop. This particular image doesn’t have a pure
white background, but it is a plain colour and has good contrast between
the subject and grey backdrop.
Head
over to the Channels palette and review each of the Red, Green and Blue
channels. Each one will be made up of slightly different tones, pick
the one with the most contrast between foreground and background. Drag
this channel onto the new channel icon to duplicate it.
With
only the new channel selected, adjust the Levels (CMD+L) to
dramatically increase the contrast between light and dark areas.
However, don’t go too far, as you’ll notice some horrendous pixilation
appearing in the fine areas.
Due
to the slight variation in tone of the background, it appears grey in
the darker areas. Use the Dodge tool set to a low Opacity to target the
highlights and brush over this background area to really brighten it up.
Switch over to the Burn tool and target the shadows to dramatically darken down the inner areas of the image to pure black.
Use the brush tool to finish off the blacks by painting over the remaining areas of the inner section of the image.
Inverse
the image to switch over the black and white areas (CMD+I), and give a
quick check for any stray areas that may have been missed by the brush.
CMD+Click
the Channel thumbnail to load the selection, then turn back on the
visibility of the original channels. Head back over to the Layers
palette and copy the selection. Paste it on a new layer and hide the
original to see the cut out image against transparency.
The
selection has managed to trim out even the finest of hairs to give a
realistic cut. Paste the photo against an alternate background. Zoom in
and check for any light coloured fringes around the edges, especially if
placed against a darker background. These can be reduced using the Burn
tool set to Highlights and gently brushed over the outline of the
image.
Technique Two: Images with Detailed Backgrounds
The
Channels technique is all well and good for studio photography with
plain backgrounds, but it gets a little more difficult on standard shots
with detailed backgrounds getting in the way.
Open
up your image in Photoshop. This image has a decent contrast between
foreground and background, but certain areas of the hair do blend in
with the darker tones of the backdrop.
Start by trimming out the clear edges with the Pen Tool, but when you reach the hair simply create a rough tracing.
Around
the hair portion, aim to include only solid areas of hair that aren’t
merging with the background, otherwise the lighter tones will mess
things up later.
Make
a selection with a feathering of 0.2 pixels to remove any harsh edges
then paste onto a new layer. Reduce the transparency of the image so
that the original hair line can just be seen.
Here’s
where the fun begins! Use the Smudge Tool to draw in areas of new hair,
using the original outline as a template. Begin with a 4px brush to
flesh out the thick base hair and disguise the jaggy lines from the
path. A Wacom Graphics Tablet really comes in handy here to speed up the
process and help add varied line thicknesses.
The
new hair will soon flesh out the image back to its original appearance.
It doesn’t look too bad at this stage, but repeating the process with a
thinner brush will draw in those individual hairs.
Use a 2px brush with the Smudge Tool to draw thin stray hairs in varied directions to add realism to the image.
The photo can then be placed on any background with ease, and displays a crisp cut-out with no fringing or loss of fine detail.
http://blog.spoongraphics.co.uk/tutorials/handy-techniques-for-cutting-out-hair-in-photoshop

discovery- الجنس :

عدد المساهمات : 1002
النقاط : 56397
التقييم : 12
تاريخ التسجيل : 2010-04-28
» Hair cutting filter for adobe photoshop in Title/Summary
» Photoshop - Web Techniques
» Handy, Free Stuff for Web Developers
» Cutting Objects in Quick Mask
» Mastering Photoshop Techniques: Layer Styles
» Photoshop - Web Techniques
» Handy, Free Stuff for Web Developers
» Cutting Objects in Quick Mask
» Mastering Photoshop Techniques: Layer Styles
Page 1 of 1
Permissions in this forum:
You cannot reply to topics in this forum